


As a companion to Indie Innovators, a special section on groundbreaking
presses and magazines, the following slideshow offers instructions on formatting your book in Microsoft Word. Don't miss our video demonstration of how to make a pocket-size book.
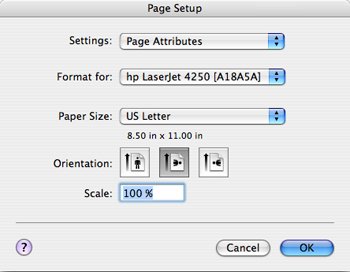
1. To format your book in Microsoft Word, open a New Blank Document (under the File menu). Go to File > Page Setup and choose the landscape orientation; click OK (fig. A).
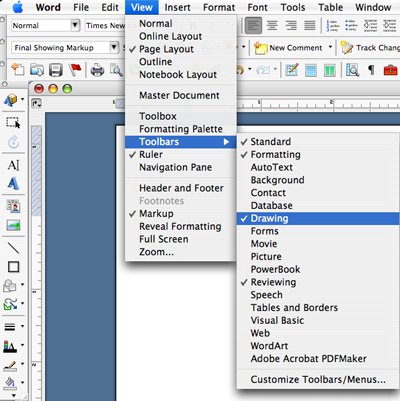
2. Open the Drawing toolbar (View > Toolbars > Drawing) as shown in figure B.
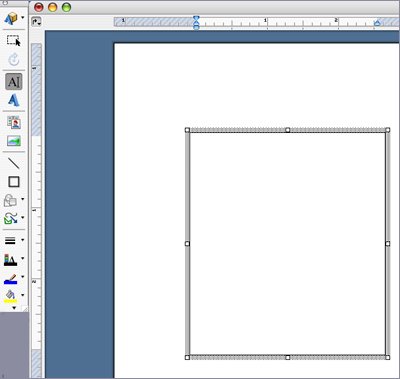
3. Select the Text Box tool and draw a box (fig. C).
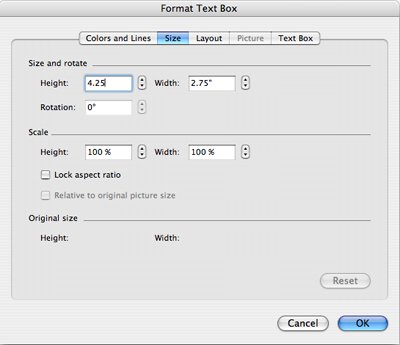
4. Double click
on any outer edge of the box, which will open the Format Text Box menu; select
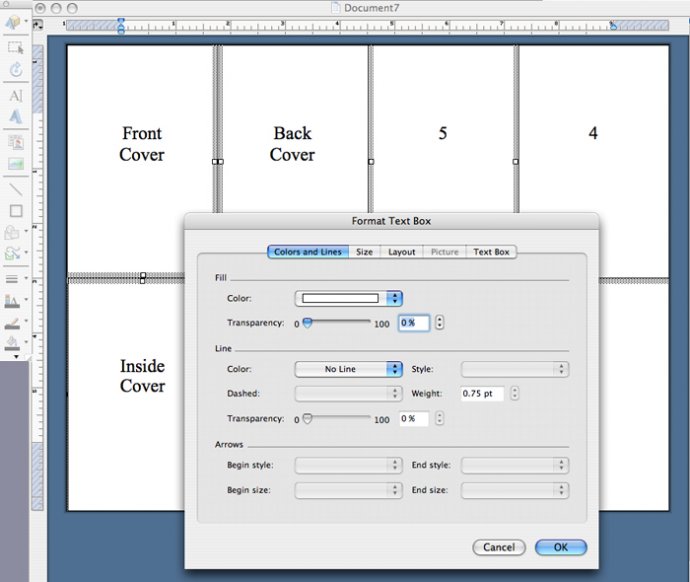
the Size tab, set the height and width to 4.25 x 2.75 inches (fig. D).
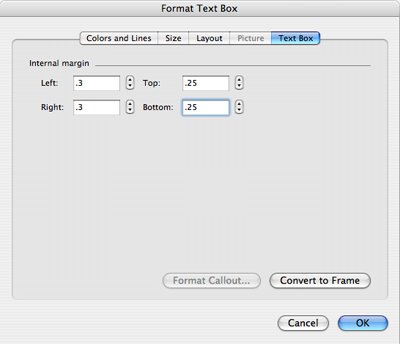
5. Select the Text Box tab, set the left and right margins to .3 inches and the bottom and top margins to .25 inches, and click OK (fig. E.).
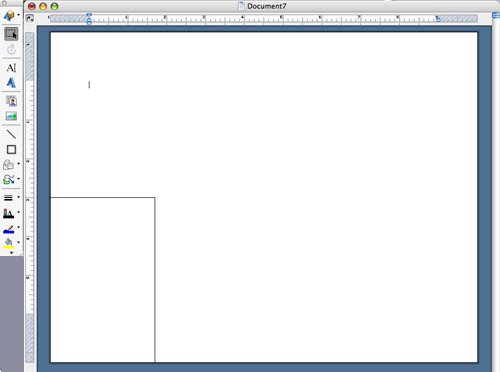
6. Using the Select Objects tool, drag the box to the edge of the bottom-left corner of the page (fig. F).
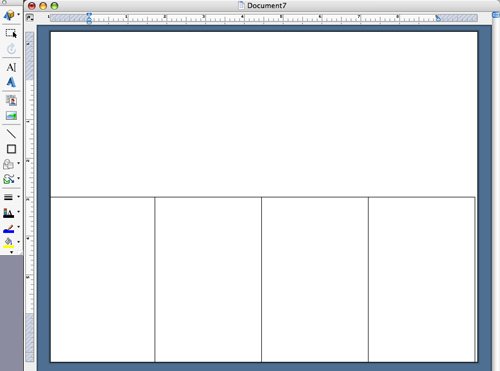
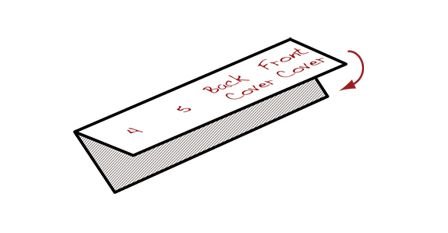
7. Copy (Edit > Copy) the box and paste (Edit > Paste) a duplicate outside the first box, then drag the copy so that it abuts the first box. Do this two more times until you have four boxes aligned at the bottom of the document (fig. G).
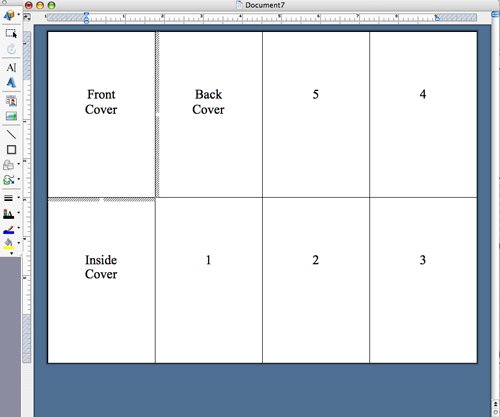
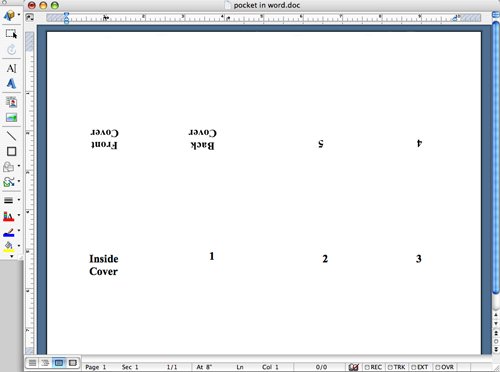
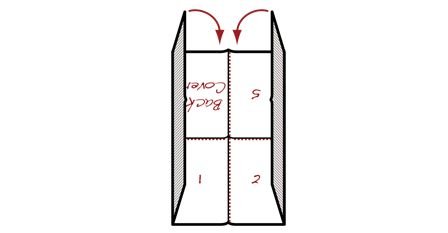
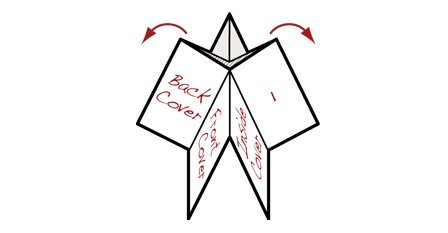
8. Select the four boxes by holding down the Shift key and clicking on each one. Copy and paste the boxes. Drag them to the top of the page, abutting the edges of the bottom boxes, so that your document is divided into eight squares. Insert your text by placing the cursor in each box in the order shown in figure H.
9. Remove the lines around the boxes by holding down Shift and clicking on all the boxes; double click on the outer edge of one of them, which will bring up the Format Text Box menu; under the Colors tab, select Color > No line. Click OK (fig. I).
10. Save this version of the
document as mybook_original.doc. Then resave the document as mybook_final.doc.
In order to flip the top four boxes as shown in figure J, you’ll need to
convert the text boxes to pictures, which means your text should be final, as
you won’t be able to edit it after the boxes are converted.
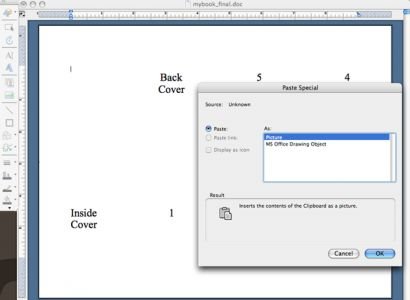
11. Working from mybook_final.doc and using the Select Objects tool, select the box in the upper-left corner by clicking on it, then select Edit > Cut, then Edit > Paste Special. Select Picture and click OK (fig. K).
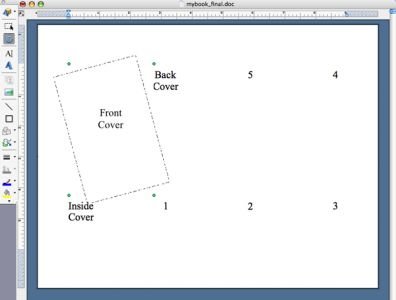
12. Click on the box and select the Free Rotate tool in the Drawing toolbar. Click and hold on any green dot and swing the box around until it’s upside down (fig. L). Move it as close to its original position as possible, using the box below it as a loose guide (you won’t be able to line it up exactly with the edge of the document, but that’s okay), and repeat this step with the remaining three boxes in the top row. Print the document on an 8.5 x 11–inch sheet of paper.
13. Fold the sheet lengthwise (fig. M). Unfold.
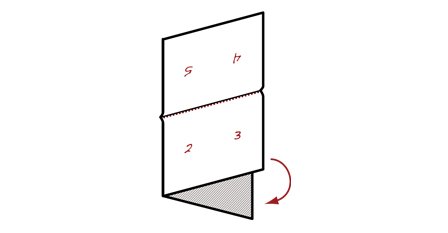
14. Fold the sheet in half horizontally (fig. N). Unfold.
15. Fold the two ends up to the middle (fig. O).
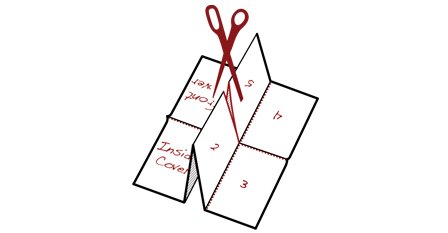
16. Tear or cut a slit along the center (fig. P).
17. Pull the torn edge apart and down (fig. Q).
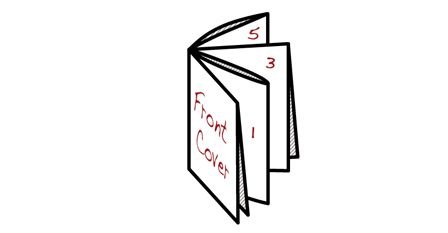
18. Fold the pages in the correct order (fig. R).